Most beginners approach asanas yoga practice by searching online for pose lists and trying to replicate images without any context for alignment or sequencing. That approach works up to a point, but it creates gaps. A single photo captures the peak of a pose. It shows where the limbs end up but not how to get there, which muscles to engage, or what to avoid along the way. Yoga poses pictures are useful references for building a home practice, but they work best alongside written alignment cues rather than as standalone instruction.
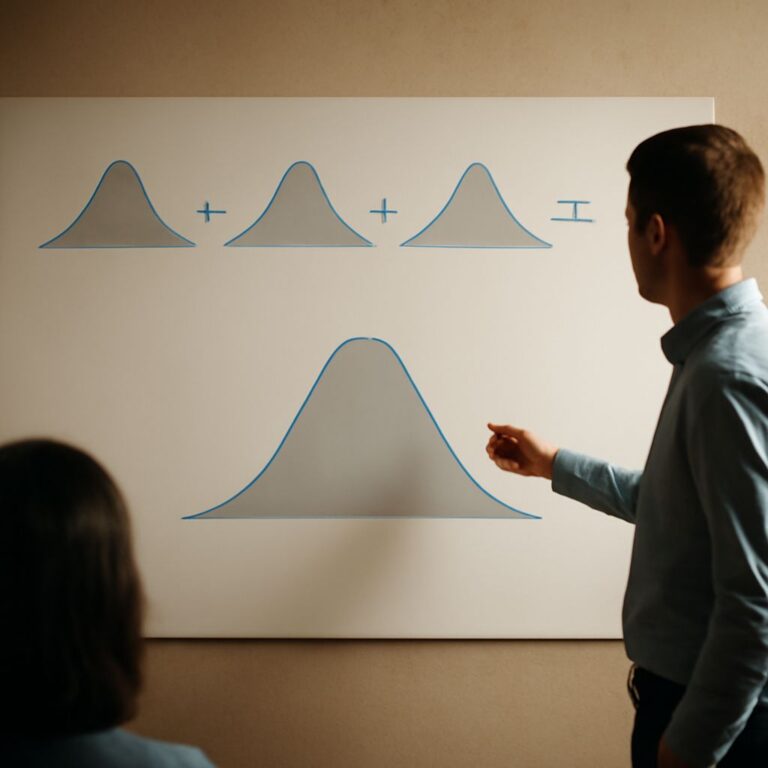
The practical value of yoga pose pictures is real when used correctly. A visual reference confirms whether your interpretation of a teacher’s verbal cue matches the intended shape. Images of yoga poses organized by category let you build balanced sequences because you can see at a glance which poses are forward folds, which are backbends, and which are lateral stretches. The most useful format is yoga asanas names with pictures and benefits presented together, so you know the Sanskrit and English names, what the posture looks like in a well-aligned body, and what physical systems it works.
Using Yoga Pose Images as Learning Tools, Not Just References
What Alignment Cues to Look for in a Good Pose Photo
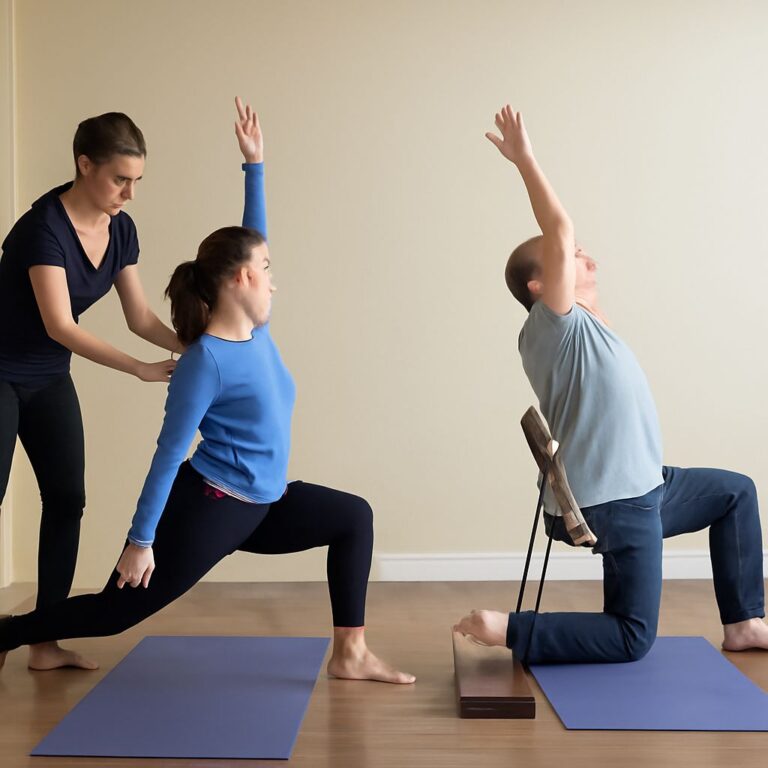
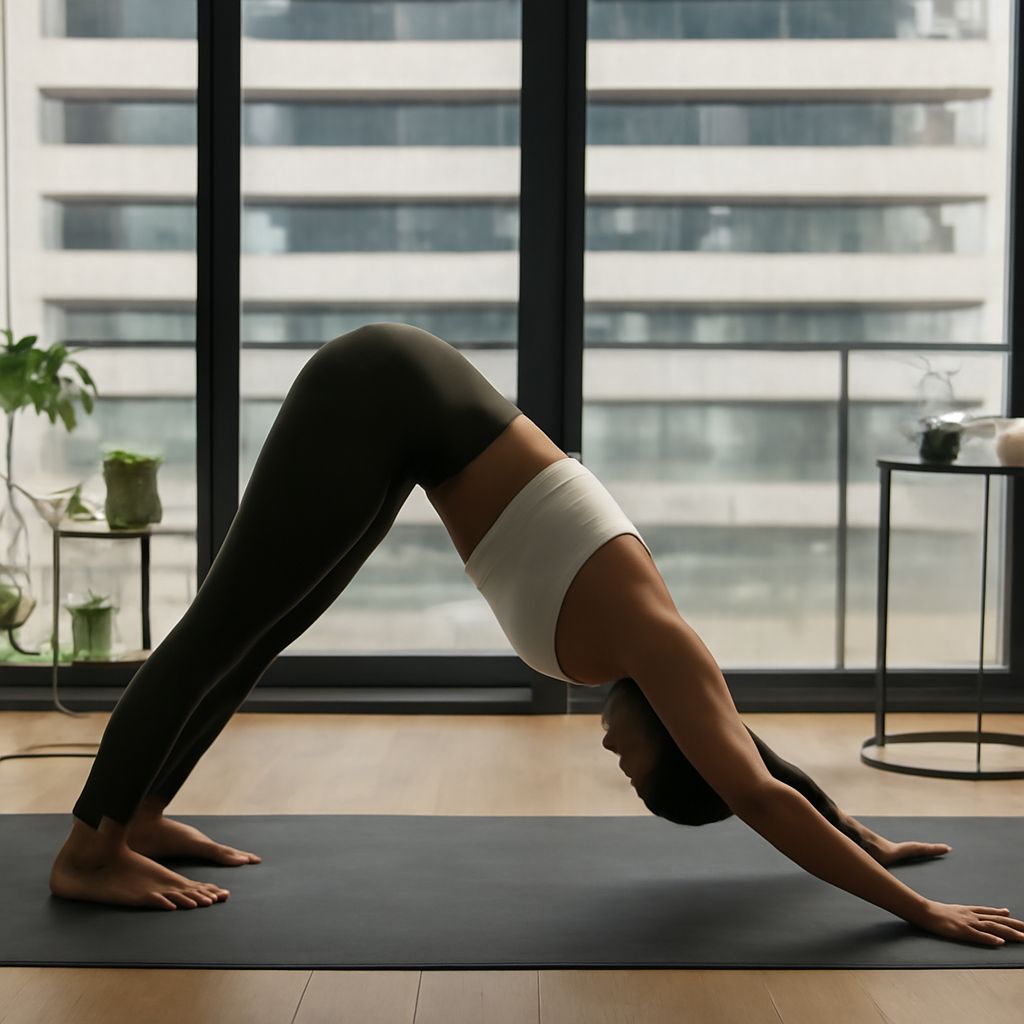
When you look at a photo of Warrior II, check these specific points in order: the front knee is directly above the front ankle, not caved inward or jutting past the toes. The back foot is at roughly 90 degrees to the front, with the arch lifted. The hips face the side wall, not the front. The torso is upright, not leaning forward over the front thigh. The arms are level with the floor, reaching actively in both directions. Each of those details is visible in a quality alignment photograph.
Poor quality pose photos show the peak position without revealing the foundational work underneath it. A flexible model can hold a deep forward fold with no visible sign of whether they are rotating from the hips or rounding from the lumbar spine, and only the latter causes long-term injury. When evaluating instructional images, look for photos taken from multiple angles and from teachers who show real anatomical alignment rather than aesthetic flexibility.
Side-view photos are most useful for understanding spinal position in forward folds and backbends. Front-view photos clarify hip and knee alignment in standing poses. Overhead views help in understanding foot placement for seated poses. A good reference library includes all three angles for each fundamental pose rather than a single dramatic front-facing shot.
Comparing before-and-after photos of your own practice taken at one-month intervals is one of the most effective tools for tracking real progress. Set up your phone on a yoga block or use a timer to take photos from a fixed position and angle. Compare shoulder height in triangle pose, hip depth in pigeon, or arm position in warrior over time. Those comparisons reveal progress that feels invisible from day to day inside the practice.
Building a Sequence Library from Pose Images
Organize your saved pose images by category: standing balance, seated forward folds, hip openers, backbends, twists, and inversions. Within each category, sort by intensity from mild to strong. That organization lets you build any session by selecting two or three poses from each category and arranging them in a logical progression that warms the body before demanding peak flexibility.
Sanskrit names matter for navigating instructional content from different teachers and traditions. When a teacher calls “Utthita Trikonasana,” recognizing it as Extended Triangle lets you set up the pose correctly without waiting to see a demonstration. Learning ten to fifteen Sanskrit names for the most common asanas gives you functional fluency in most class environments without requiring years of study.
Benefits listed with pose images help you make intentional choices about what to practice on a given day. Hip-opening poses reduce tension from long periods of sitting. Shoulder-opening backbends counter the rounded posture that comes from screen work. Core-focused poses build the foundation that makes advanced arm balances possible later. Using benefit information alongside visual references turns random pose exploration into a purposeful practice.
Pro tips recap: Save pose images organized by category, not by difficulty. Look for multi-angle photographs that show alignment from the side and front. Learn Sanskrit names for ten to fifteen core poses. And photograph your own practice monthly so the real progress in your body becomes visible rather than just felt.